HULFT Square Technical Column [Connecting] Connecting to CloudSign
HULFT Square Technical Column [Connecting Edition] List
I connected to CloudSign
Introduction
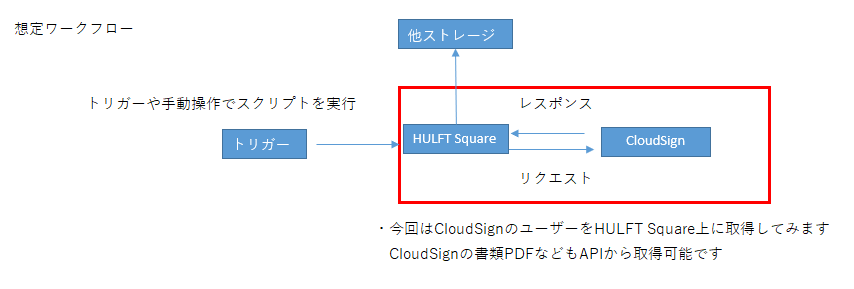
The trend towards paperless systems, which was made possible by the Electronic Bookkeeping Act of 2016, is still having a significant impact, and I believe many companies are using related services. In this article, I would like to explore digital transformation for one of these services, CloudSign, using HULFT Square.
What is CloudSgin?
CloudSign is an electronic contract service provided by Bengo4.com Co., Ltd.
By creating a user account, you can easily use the electronic contract function.
Cloudsign also implements various processes via API, allowing it to integrate with user systems using REST.
Verification details
- Get User
Advance preparation
CloudSign settings
To use CloudSign's API, you need a client_id.
- CloudSign's API cannot be used in the free trial environment. You must have a Standard plan or higher account.
Log in using the following URL:
- Normal environment: https://www.cloudsign.jp/login
- Sandbox environment: https://sandbox.cloudsign.jp/api/clients
Once you have logged in using the URL above, select [Issue a new client ID] in the top right corner of the page to obtain a 36-digit client_id.
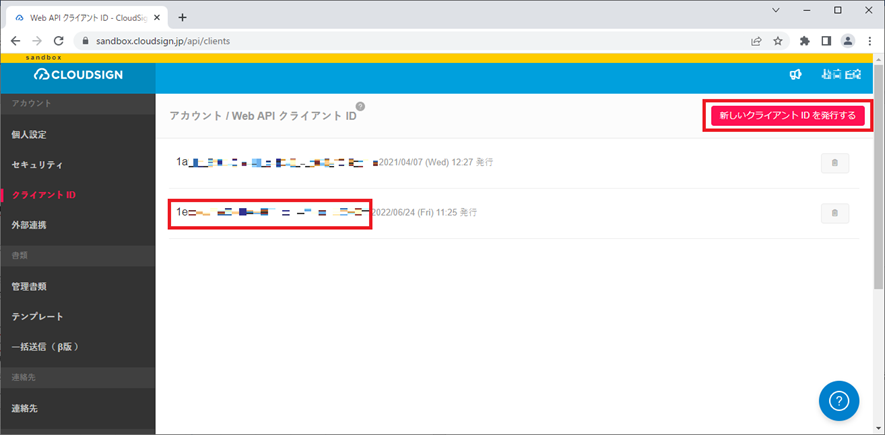
This completes the setup on Cloudsign.
HULFT Square settings
Once the setup on the CloudSign side is complete, the next step is to configure HULFT Square to connect to CloudSign.
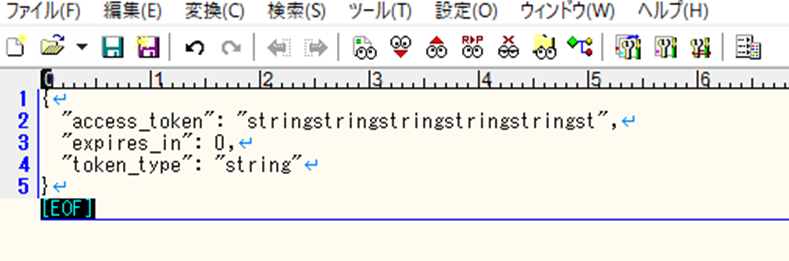
First, we need to create a file. Create a text file called token.json in your local environment.

Once created, open token.json. An editor will appear, so enter the following and save it.
{
"access_token": "stringstringstringstringstringst",
"expires_in": 0,
"token_type": "string"
}
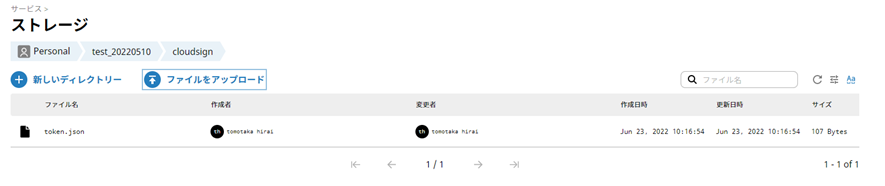
Save the file in any directory in HULFT Square. After moving to the directory, select "Upload file" and upload the file you created.
Next, create a project and a script in it and define a script variable. Select [New Script Variable] from the top menu of the designer.

The variable name can be anything, but in this case, enter [access_token], specify the variable type as a string, and select [Finish].

Next, from the tool menu on the right, select [Network] > [REST] > [Execute post] and drop it into the script. Enter the settings in the settings screen that appears.
First, configure the settings in the Required Settings tab.
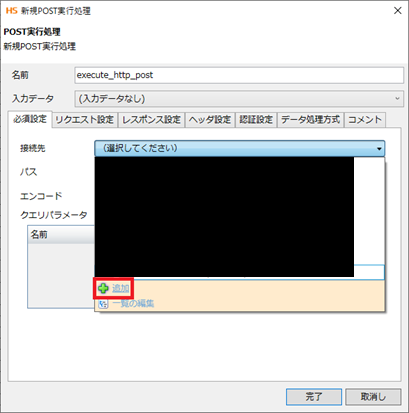
Select the connection destination text box and select "Add". This setting will set the REST connection URL. The "path" set later will be appended to the end of this setting and will become the final endpoint.
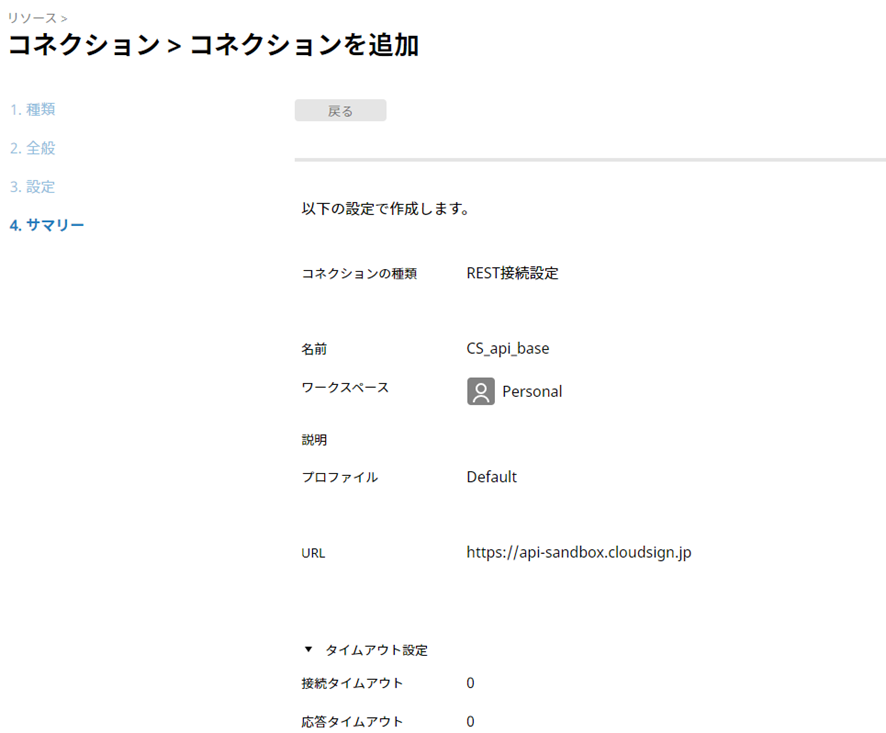
This time,
- Name: [CS_api_base]
- Normal environment URL: [https://api.cloudsign.jp]
- Sandbox environment URL: [https://api-sandbox.cloudsign.jp]
Set it and select Finish.
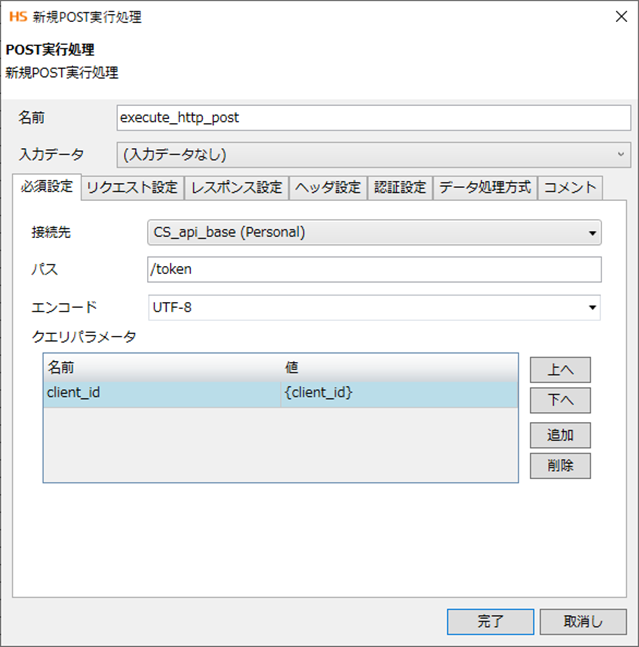
Next, set the path.
The final endpoint of the API we will use this time is [https://api-sandbox.cloudsign.jp/token], so the remaining endpoints that are not set in the connection settings are
- [/token]
Let's set it up.
Finally, select Add query parameters and enter them as shown in the image.
- For {client_id}, enter the 36-digit string obtained from CloudSign.
Next, go to the Response Settings tab. Here you can configure how to handle the response. In this case, we need to assign the response content to a variable, so select [Data] as the data output destination and [JSON] as the data format.
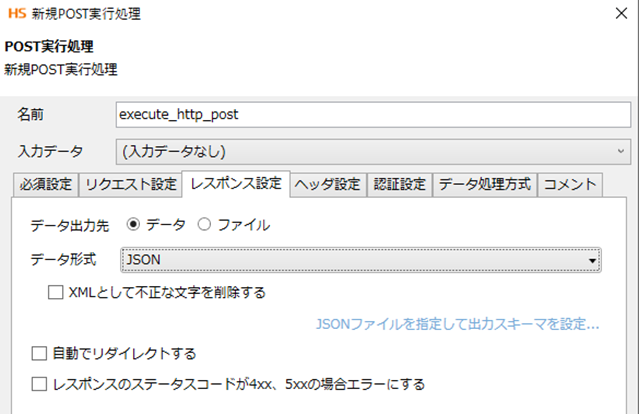
When you select Json, a link to the schema settings will appear in blue. Select this link. Select and open the [token.json] file you created in the first step.
Finally, open the Header Settings tab, select [Add] in Request Headers, and set [Content-Type].
- [Content-Type] application/x-www-form-urlencoded
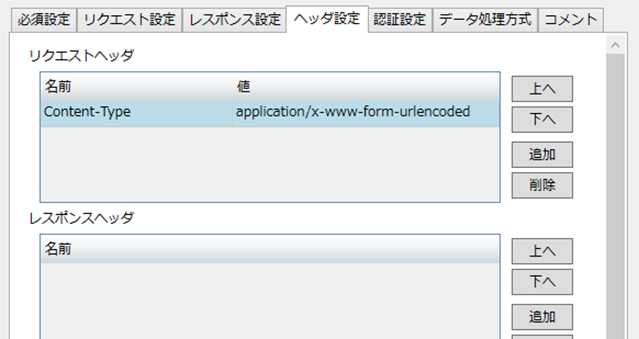
The rest of the settings can be left as default.
Once you've completed the above, select Finish.
Although request data is not required for post execution this time, we will create it to avoid errors. From the tool menu on the right, click [Transformation] > [Processing] > [Mapping] and drop it onto the script, then drop it onto the post execution component we created to connect the process flow and data flow.
Next, double-click the mapping to open it. Right-click "Post Execution" in the output destination on the right and add a root and child element. Set appropriate values for the added element.
Next, from the tool menu on the right, drop [Basic] > [Processing] > [Variable Assignment] onto the script, and drop the post execution icon you created earlier onto the variable assignment (variable) icon to connect the process flow.
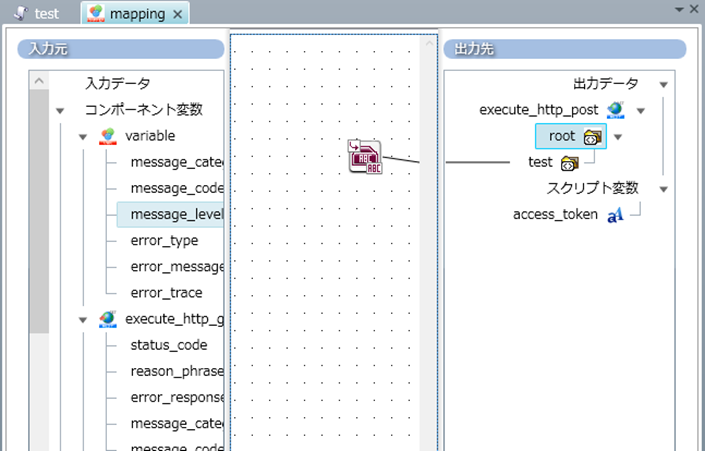
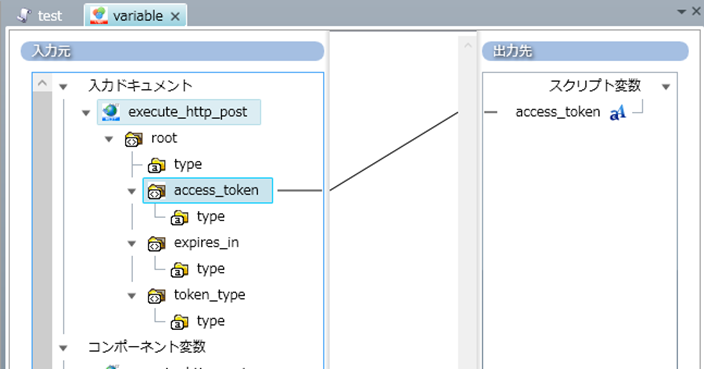
Then double-click the variable to open the mapping.
By dropping [execute_http_post] > [access_token] on the left side onto [Script Variables] > [access_token] on the right side, you can create a data flow as shown below.
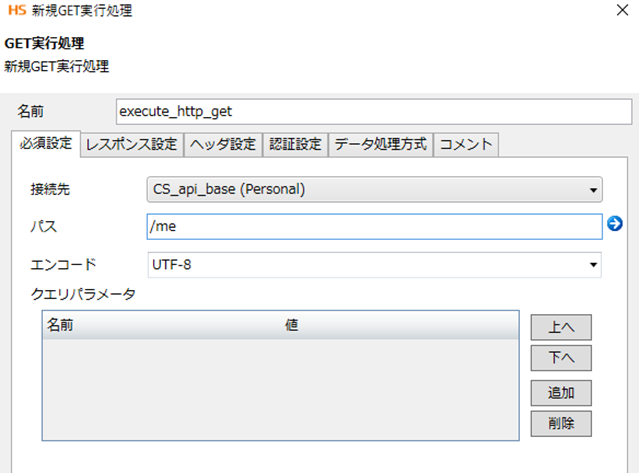
Next, create the part that uses the API. From the Tools menu, select [Network] > [REST] > [GET Execute] and drop it into the script.
A familiar screen will appear, so change the path to [/me] as shown in the image below and set it up. No query parameters are required.
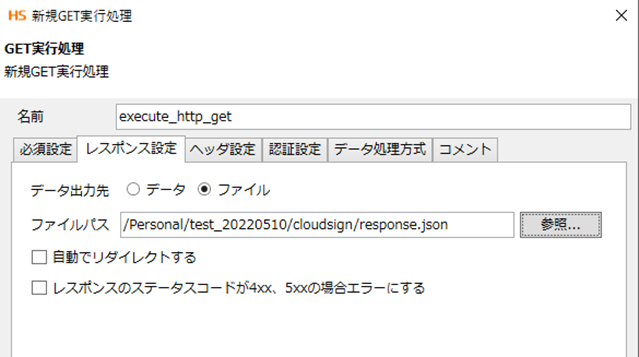
Next, go to the Response Settings tab.
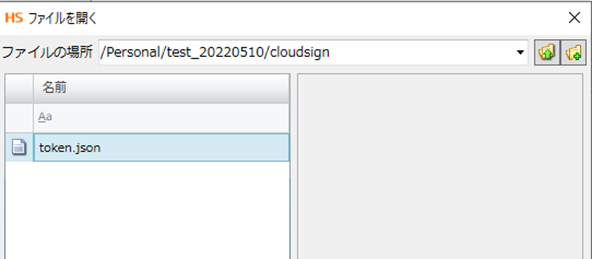
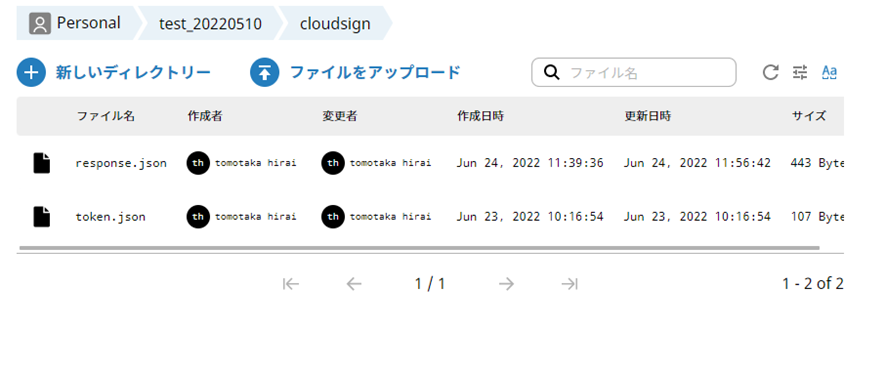
Since we just want to get the data this time, we set the data output destination to a file. The file path can be anything you like, but in this case we will use [/Personal/test_20220510/cloudsign/response.json].
Finally, set the access token you obtained earlier in the header settings.
Next to Request Headers, select Add and enter the following:
- [Authorization] Bearer ${access_token}
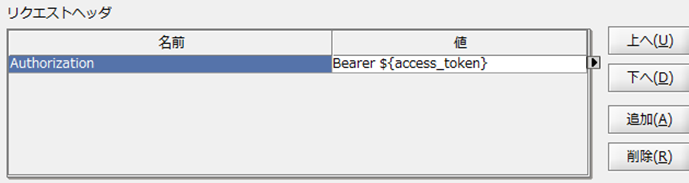
By using ${variable name}, you can set a variable as a value.
You can set variables manually, but you can also easily set them by clicking the right triangle that appears when entering a value.
The rest of the settings can be left as default.
Once the above is complete, select Finish.
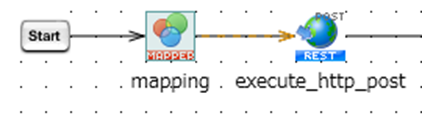
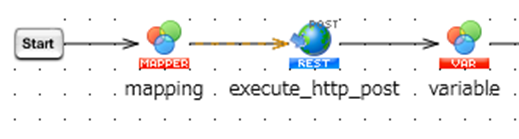
Finally, drop the [variable] icon onto [execute_http_get] to create a process flow, and in the same way create a process flow from [start] to [execute_http_post] and from [execute_http_get] to [end].
This completes the script setup.
Creating and Running Scripts
Run the test from the menu at the top.


Once the script is complete, open Explorer in HULFT Square and check the directory you specified as the file output destination. If response.json is created and contains the information of the user who created it, the script was successful. (Since it is in UTF-8, if the characters are garbled, right-click response.json to download it locally and view it using Windows Notepad or similar.)
Conclusion
What did you think?
By using HULFT Square, we were able to obtain CloudSign information.
Although what we did this time was a simple connection check, various CloudSign information can be controlled using the API, such as backing up electronic documents to other file storage and automatic sending. We hope you will take this opportunity to try out the integration with CloudSign with HULFT Square.