HULFT Square Technical Column [Connecting Edition]
Connecting to Zoho CRM (Customer Relationship Management System)
HULFT Square Technical Column [Connecting Edition] List
- I connected to CloudSign
- I connected to freee
- Connecting to Zoho CRM (Customer Relationship Management System)
- Connecting to Zuora: Subscription business with HULFT Square
- I connected to Adobe Acrobat Sign.
- I connected it to GMO Sign.
Connecting to Zoho CRM (Customer Relationship Management System)
Introduction
Customer Relationship Management (CRM) systems are very popular in today's businesses. For example, by using CRM tools to understand the preferences and interests of each prospective customer, you can increase your sales and closing rates.
In addition, by sharing customer information with other systems within the organization, it is possible to increase the value of the information through synergy. For example, by linking customer information from one branch to another, it becomes possible to share customer service know-how between branches.
Therefore, it is becoming more important than ever to integrate CRM with other systems within an organization.
What is Zoho CRM?
Zoho CRM is a CRM tool developed by Zoho.
Zoho CRM allows you to manage customer information, sales opportunity information, and various documents by creating a user account.
Zoho CRM also implements various API-based processes, allowing it to integrate with systems that use REST.

Verification details
This time, we will use HULFT Square to confirm that the following processes can be performed.
- Get Account Information (Get account information from Zoho CRM)
- Registering customer information (Registering customer information in Zoho CRM)
Advance preparation
◎ Zoho CRM account registration
First, we will obtain the information necessary for integration from Zoho CRM.
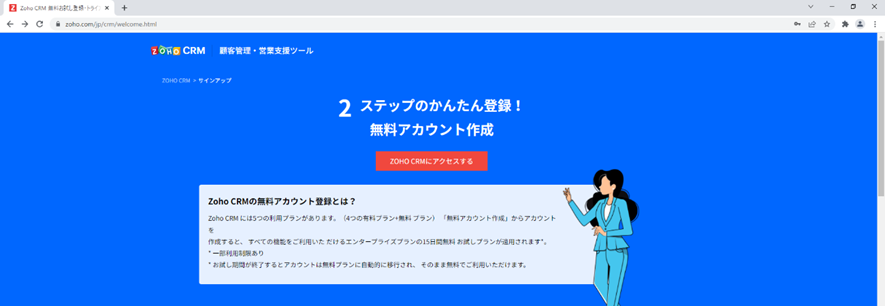
Please note that you must have a Zoho CRM user account. If you do not have a Zoho CRM user account, please create one using the link below.
https://www.zoho.com/jp/crm/welcome.html
In addition, to authenticate the REST API using OAuth authentication, register the client using the following procedure.

- Visit the Zoho Developer Console.
The links are as follows:
https://api-console.zoho.com/ -
Once you have access, select server-based Applications.

-
Please enter the required information.
Please note that this task will set Authorized Redirect URIs, so please perform it in parallel with the connection settings for OAuth authentication in HULFT Square settings described below.
Client Name: Any
Homepage URL: Any
Authorized Redirect URIs: URLs automatically set by HULFT Square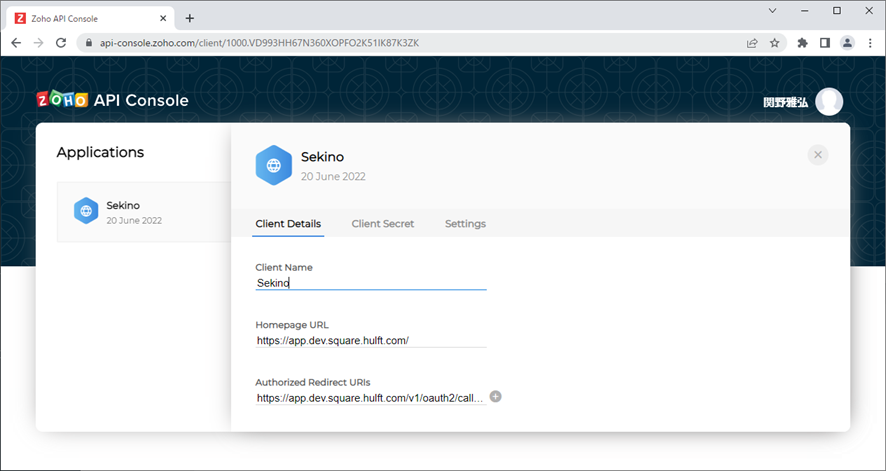
-
Once you have registered, please copy and save the [client_id] and [client_secret].
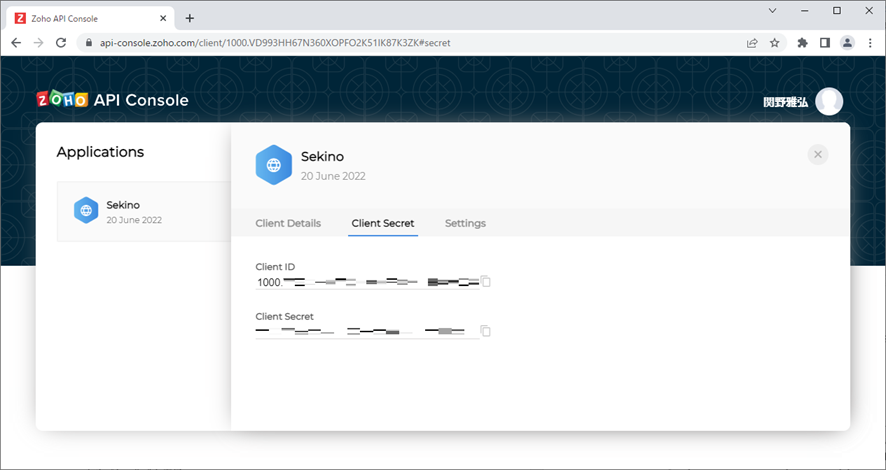
The information saved here will be used when creating a connection.
-
In Settings, set the region of the client that can be used. For testing purposes, we will allow domains from all regions.
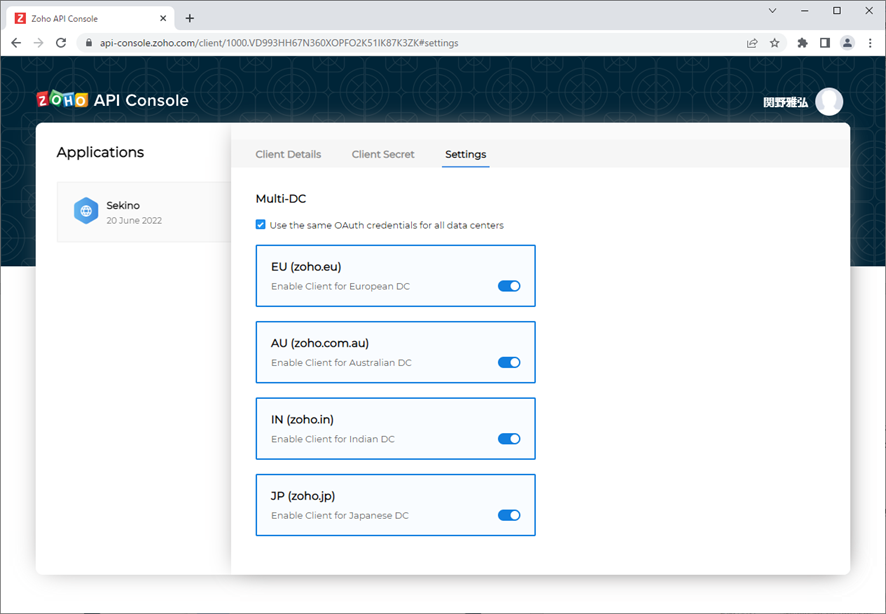
Once you have completed the settings, click the button in Client Details to save or update the settings.
-
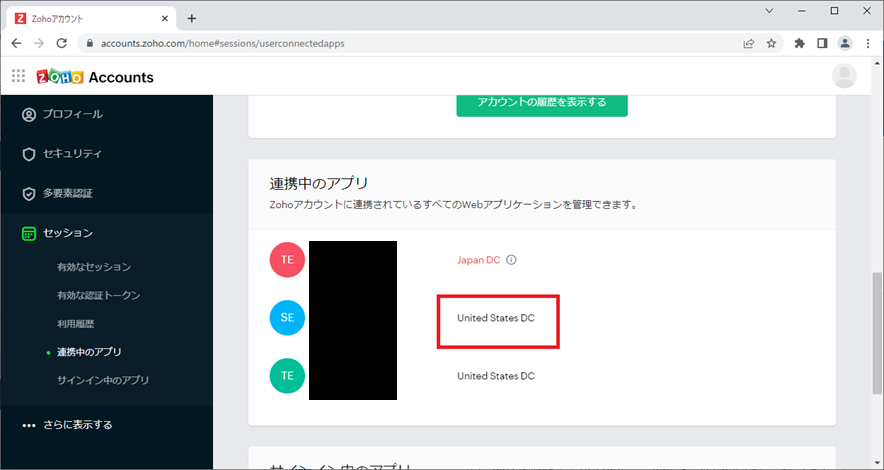
Check the district name of the application you created. Click on the name and then click "My Account." When the Account screen appears, select "Session" on the left, then "Connected Apps," and check the value of the App's data center (Japan DC, United States DC, etc.) for the app you want to connect. You will use this value later when setting up HULFT Square.
◎ HULFT Square settings
The steps to set up HULFT Square to connect to Zoho CRM are as follows:
- Setting up the connection (you need to create a connection for authentication and a REST connection)
- Creating and Running Scripts
Connection Settings
Open Connections and click Create a new connection.
Configure the connection for OAuth authentication as follows:
Please note that this task should be performed in parallel with the server-based applications configuration described above, as it sets up Authorized Redirect URIs.
Also, the domains of the authorization endpoint and token endpoint will vary depending on the app's data center of the application you are integrating with. Please check and change them using the URL below.
https://www.zoho.com/crm/developer/docs/api/v3/multi-dc.html
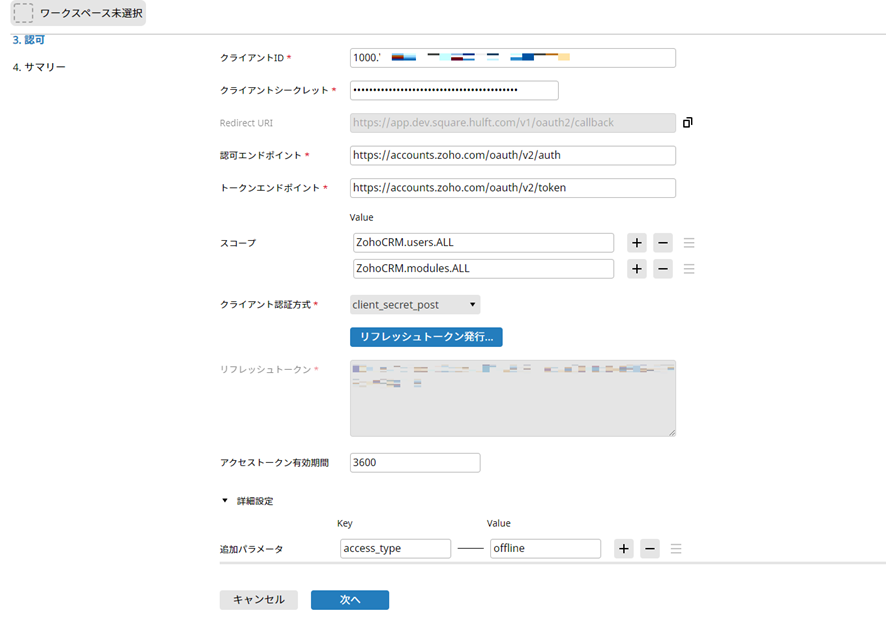
Client ID: 4 [client_id]
Client Secret: [client_secret]
Redirect URI: [URL automatically set by HULFT Square]
Authorization endpoint: [App's data center domain]/oauth/v2/auth
Token endpoint: [App's data center domain]/oauth/v2/token
Scope: ZohoCRM.users.ALL, ZohoCRM.modules.ALL, ZohoCRM.coql.READ (any others)
Client authentication method: client_secret_post
Additional parameters
Key: access_type
Value: offline
Once you have completed the above steps, click Issue Refresh Token to set the refresh token.
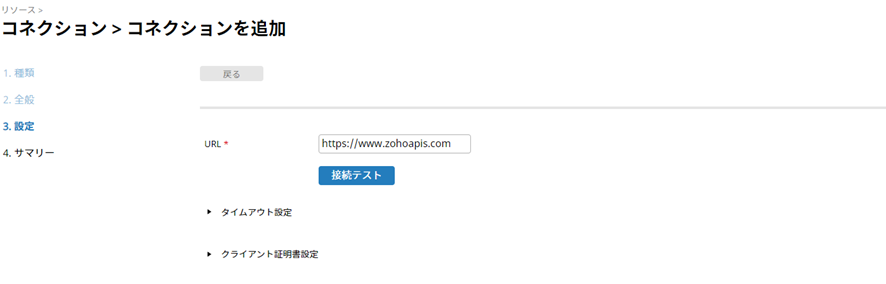
Then, configure the connection for the REST connection.
Please note that the URL will vary depending on the app's data center of the application you are linking to, so please check the URL below and change it accordingly.
https://www.zoho.com/crm/developer/docs/api/v3/change-log.html
URL: [App's data center URL] *In the image, https://www.zohoapis.com/
Everything else is fine with the default settings.
Creating and Running Scripts
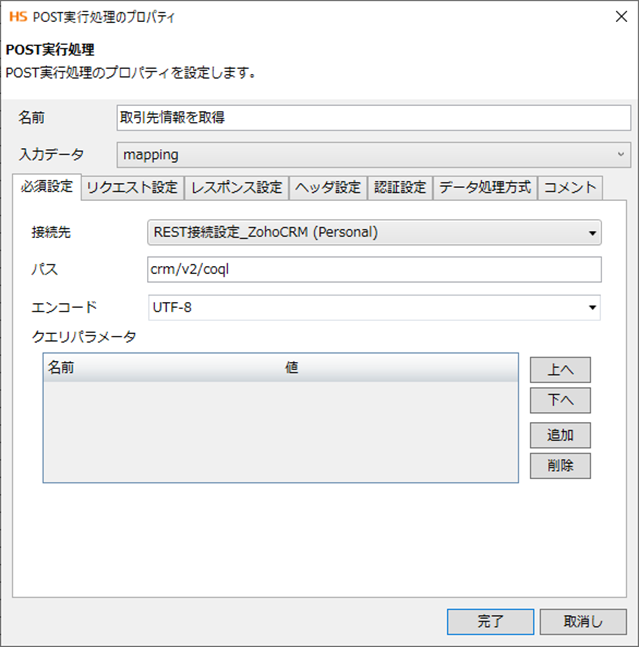
① Acquire customer information (acquire customer information from Zoho CRM)
[REST adapter settings]
Configure the REST API so that it can be executed in POST format.
Set the component values as follows:
- Required settings
Connection destination: The name of the REST connection you created earlier
Path: crm/v2/coql
Encoding: UTF-8 - Request Settings
Data input source: Data
Data format: JSON
* Place a mapping component immediately before the REST adapter and set the parameters.
*For details about parameters, please refer to the URL below.
https://www.zoho.com/crm/developer/docs/api/v2/Get-Records-through-COQL-Query.html - Response Settings
Data output destination: Data
Data format: JSON
Error if response status code is 4xx or 5xx: true - Authentication Settings
Authentication: Use Auth connection
Connection: The OAuth authentication connection you created earlier.
Everything else is fine with the default settings.
②Mapping
Data mapping is performed to register and update the business partner information obtained in step 1 in the partner master.
Please set the mapping contents according to the master and specifications of the linked destination.

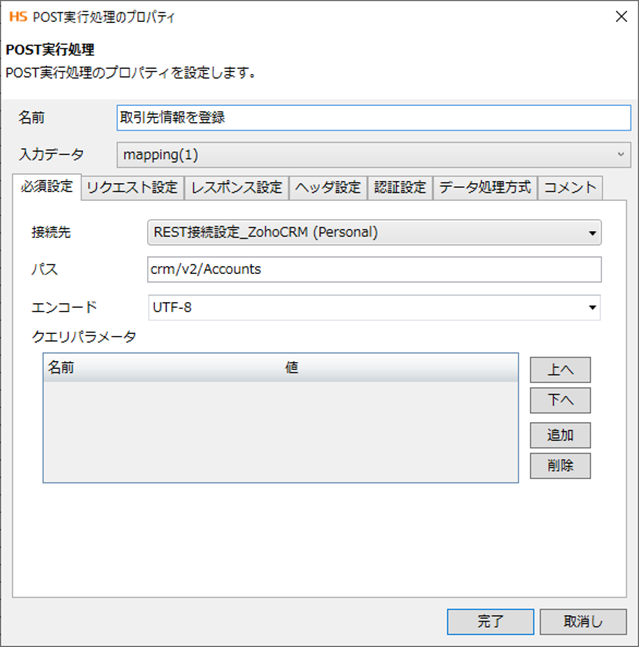
③Register customer information (register customer information in Zoho CRM)
[REST adapter settings]
Configure the REST API so that it can be executed in POST format.
Set the component values as follows:
- Required settings
Connection destination: The name of the REST connection you created earlier
Path: crm/v2/Accounts
Encoding: UTF-8 - Request Settings
Data input source: Data
Data format: JSON
* Place a mapping component immediately before the REST adapter and set the parameters.
*For details about parameters, please refer to the URL below.
https://www.zoho.com/crm/developer/docs/api/v2/insert-records.html - Response Settings
Data output destination: Data
Data format: JSON
Data output destination: true
Error if response status code is 4xx or 5xx: true - Authentication Settings
Authentication: Use Auth connection
Connection: The OAuth authentication connection you created earlier.
Everything else is fine with the default settings.
Once you have completed the settings up to this point, check that the process is completed successfully.
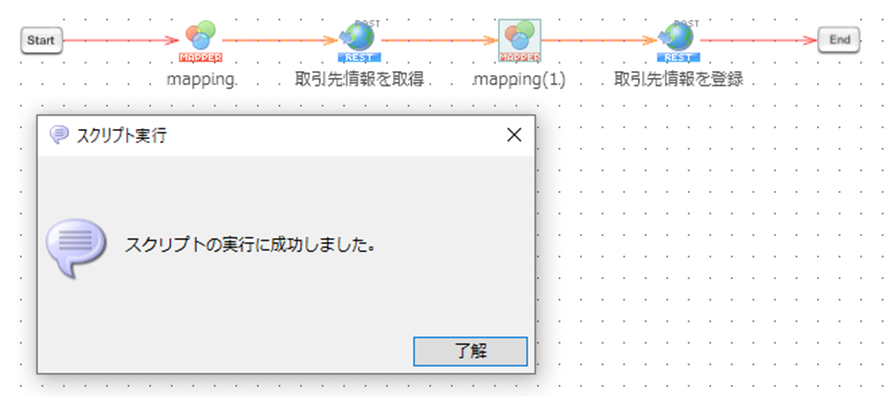
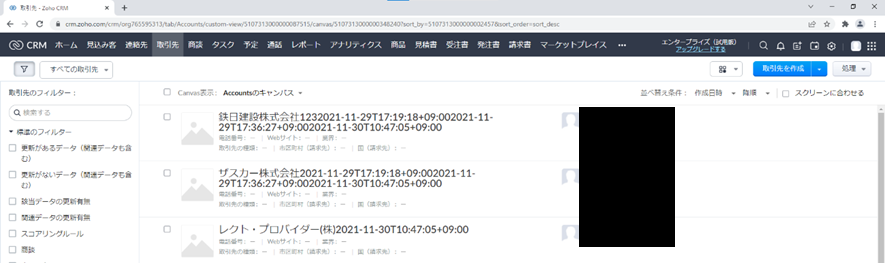
You can confirm that the account information has been registered in the specified Zoho CRM.
Conclusion
What did you think?
By using HULFT Square, we were able to register customer information in Zoho CRM.
In addition to what we have done this time, you can also use HULFT Square to link information other than customer information, or to link data to another CRM system, so we hope you will refer to this article and try out linking Zoho CRM with HULFT Square.
HULFT Square Technical Column [Connecting Edition] List
- I connected to CloudSign
- I connected to freee
- Connecting to Zoho CRM (Customer Relationship Management System)
- Connecting to Zuora: Subscription business with HULFT Square
- I connected to Adobe Acrobat Sign.
- I connected it to GMO Sign.