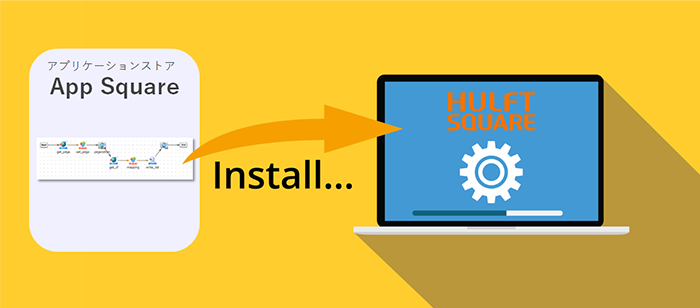
HULFT Square
Japan-based iPaaS (cloud-based data integration platform)
More detailed instructions for using HULFT Square application
What is HULFT Square application?
HULFT Square Applications are functions that provide pre-created data integration scripts in a package that makes them easy to reuse.
By using the application, you can easily and efficiently create SaaS connections and collaboration platforms.
How to use the application
The application is available free of charge to all HULFT Square users. We will show you how to use the application.
1. Prepare for deployment
HULFT Square application uses scripts that are included with the application by copying them to your own project. First, let's create a project to copy the scripts to, referring to the tutorial "Creating a Project"!
2. Install the application
Once you have created the destination project, the next step is to install the application into your HULFT Square environment. You can install it from App Square in the app store.
Select "App Square" from the menu displayed in the upper right corner of HULFT Square site.

App Square has a large number of ready-to-use applications available. Use the search function to find an application that matches your needs, and then install it right away.
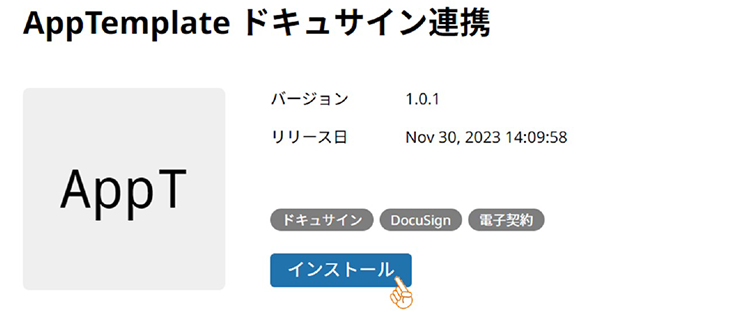
- To install an application, you must operate as a user with "ApplicationAdminAccess" privileges. If the privileges are not granted, please refer to the tutorial "Let's set up users and groups" to grant the privileges.
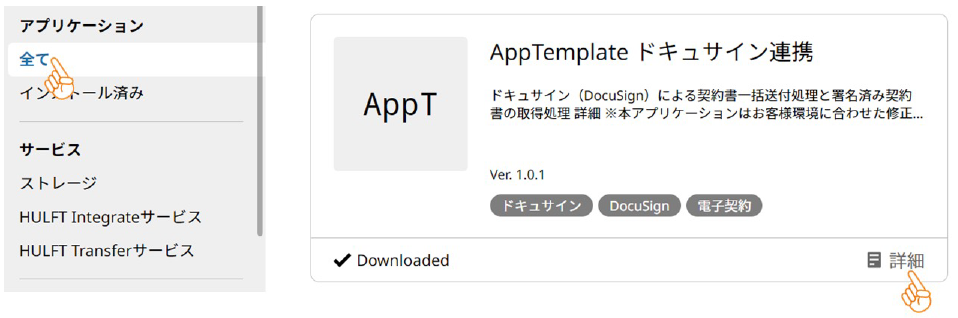
You can check the installed applications on the "All" page of HULFT Square website. Select "All" from the navigation menu and click the "Details" link for the application.
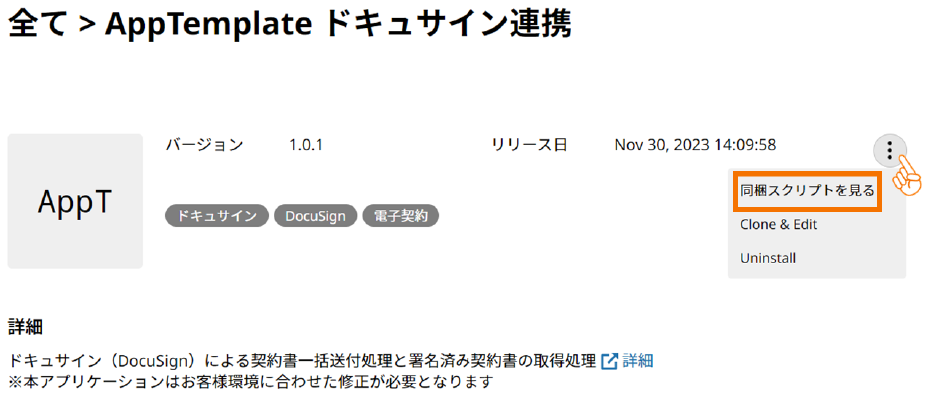
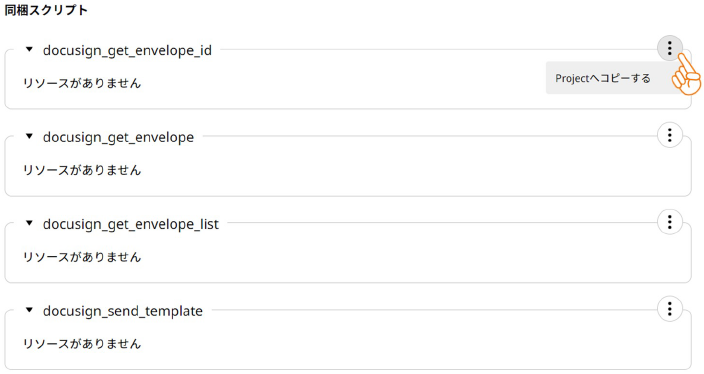
Click the three dots in the top right corner of the details page and from the menu that appears, click "View included scripts."
A list of scripts included with the application will be displayed. Click on the three dots and select "Copy to Project" from the menu that appears.
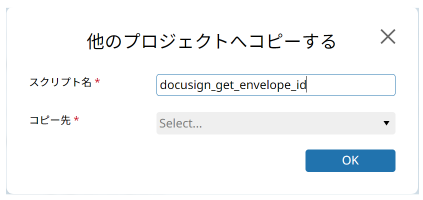
A dialog box will appear asking you to select the destination project. Select the destination project you created in "1. Prepare for installation" and click "OK."
Once the installation is complete, let's start customizing it!
3. Customize it to suit your needs
You can make the copied script even more convenient by customizing it to suit your needs. Here are some tips for customization.
Customizing the connection resource you want to connect to
Many publicly available applications incorporate the ability to connect to SaaS through REST APIs.
Generally, connections to SaaS services require different authentication information for each customer, so customers must create their own connection resources, which are the authentication settings for connecting to SaaS services.
The application introduction page may explain how to create a connection resource, so please refer to it.
Customizing what a script does
If the scripts included with the application don't exactly suit what you want to do, you can add or modify processes to suit your needs.
Customization Examples
- Change the output folder for files
- Modifying REST API request parameters
- Add an automatic retry process when an error occurs
etc.
By customizing the application to suit your needs, you can create a system that perfectly meets your requirements without having to start from scratch.