HULFT Square Technical Column [Connecting Edition]
I connected it to GMO Sign.
HULFT Square Technical Column [Connecting Edition] List
I connected it to GMO Sign.
Introduction
The trend towards paperless systems, brought about by the Electronic Bookkeeping Act of 2016, is still having a significant impact, and I believe many companies are using related services. In this article, I would like to explore digital transformation using HULFT Square for one of these services, GMO Sign, the electronic seal from GMO GlobalSign Holdings, Inc.
What is GMO Sign?
The electronic seal GMO Sign (hereinafter referred to as GMO Sign) is an electronic contract service developed and provided by GMO GlobalSign Holdings, Inc.
By creating an account, you can easily use the electronic contract function. Also, because GMO Sign is a service that focuses on the sender of the contract, the recipient of the contract does not need to have a GMO Sign account.
Furthermore, GMO Sign implements various processes via API, enabling integration with other systems and services using REST. For example, you can use an HTTP trigger to kick off a process in HULFT Square, and then use the API to send a contract from GMO Sign, as shown below.
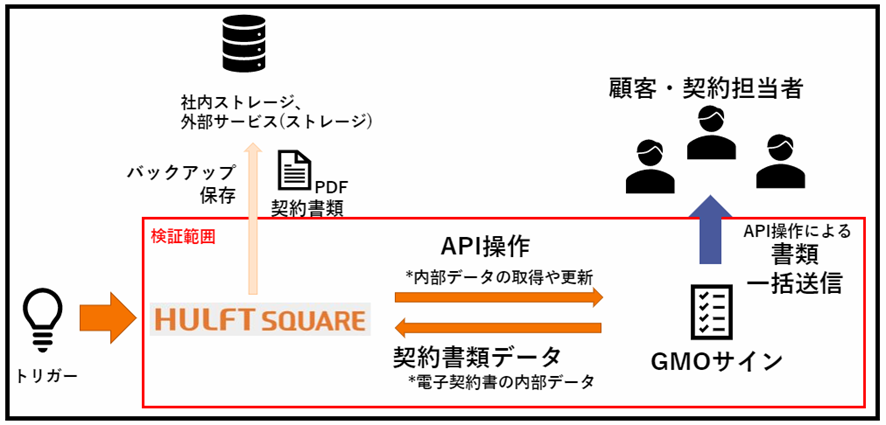
Verification details
This time, we will use HULFT Square and GMO Sign APIs to confirm that the following processes can be performed.
- Sending contracts to multiple recipients at once
Advance preparation
◎GMO Sign settings
To use GMO Sign's API, you will need authentication information to connect. This must be issued in advance by GMO Sign, so you will need to inform them that you will be using the API and they will issue the authentication information.
You can also check out the basic functions by obtaining a free trial plan account from the URL below.
Pricing Plans│For electronic contracts, use GMO Sign's electronic seal
(If you want to migrate to a development environment, you will need to contact GMO Sign.)
◎ HULFT Square settings
Once we have obtained the authentication information from GMO Sign, we will proceed with setting up the connection between GMO Sign and HULFT Square.
First, set up the connection. Open [Resources] > [Connections], select the blue [Add New] button, and create it with the following settings:

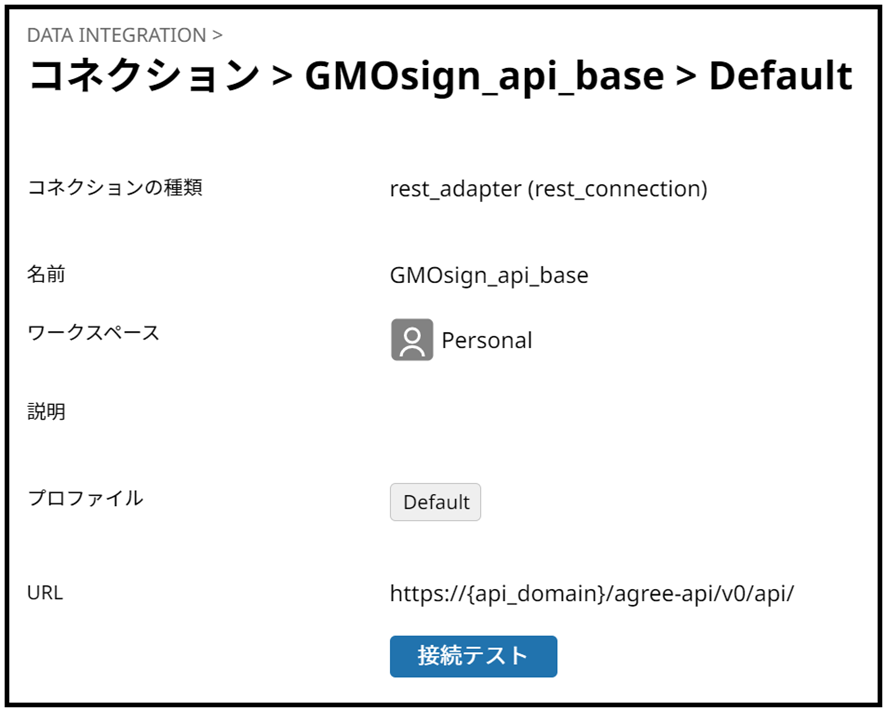
- Connection information (for copying)
Type: REST > REST Connection
Name: GMOsign_api_base
URL: https://{api_domain}/agree-api/v0/api/
- {api_domain} will be specified when you receive authentication information from GMO Sign, so enter that. If the value is incorrect, authentication will not pass.
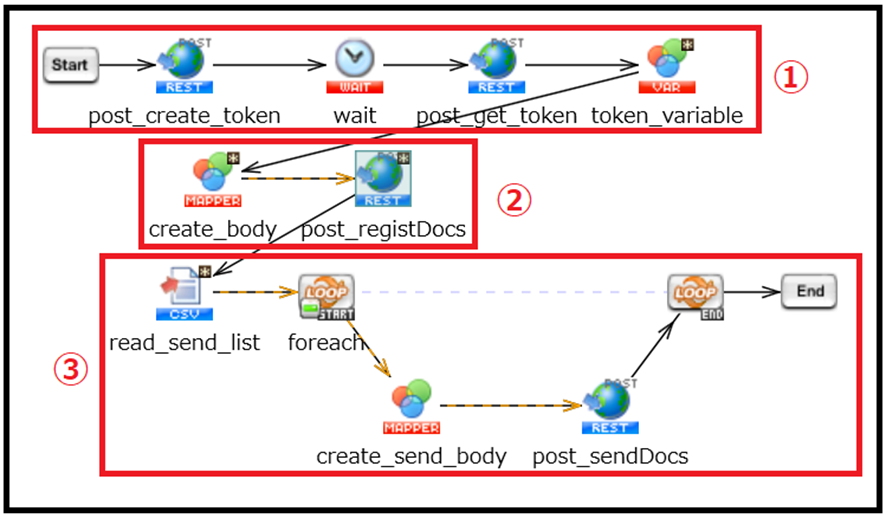
Script Overview
The script we will create this time is as follows:
- Obtaining an Access Token
- Register a contract using API
- Send contracts to multiple recipients at once using API
Scripting
1. Obtain an access token
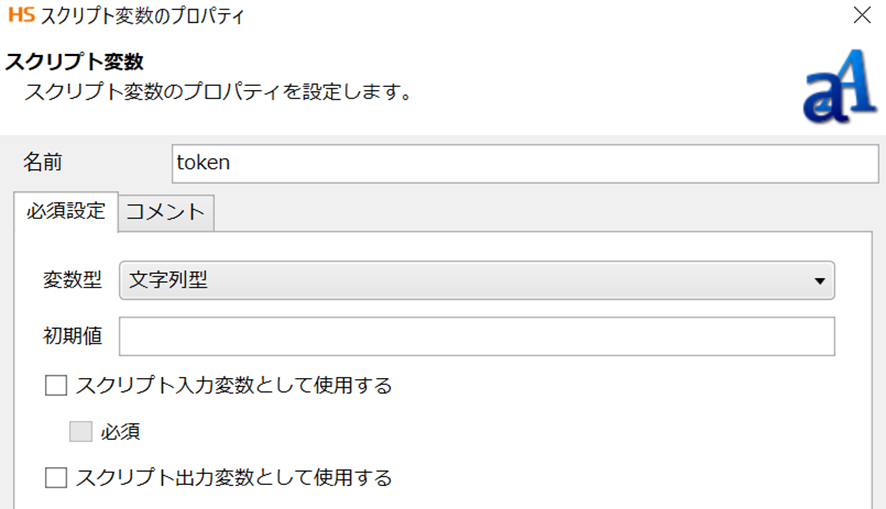
Create a script in any project and define a script variable. Select [Create New Script Variable] from the top menu of the designer.

The variables to be created are as follows ([blank] means leave the value empty. Change the value in {} to the specified value). You can also create variables to be used later here.
Variable name/type/value
- token/string/[blank]
- cus_id/string/{ID given by GMO Sign (hereafter {cus_id})}
- secret/string/{secret key received from GMO Sign (hereafter referred to as {secret})}
- document/string/{Contract PDF converted to base64}
- doc_code/string/test_doc
- envelope_name/string/{optional contract name}
- document_name/string/{any document name}
- 1(int)/string/1
Next, from the right menu, select [Network] > [REST] > [Execute POST] and drop it into the script field. Enter the following settings into the settings screen that appears.
- Required settings
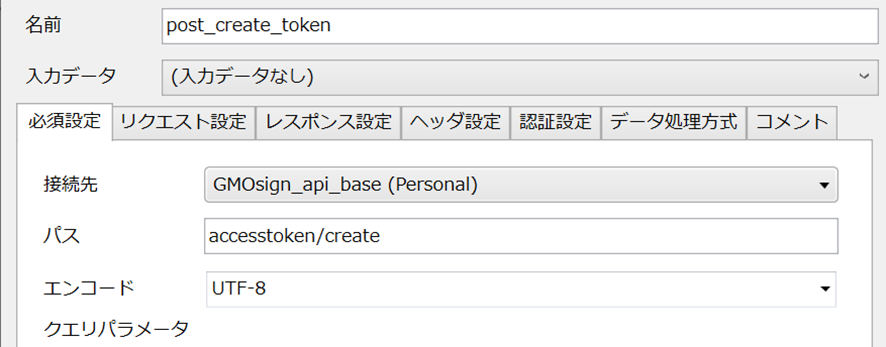
- Connection information (for copying)
name : post_create_token
Destination: GMOsign_api_base
Path: accesstoken/create
- Request Settings
This time, we will submit the following json as is. Enter the specified values within {} and store it in the storage within HULFT Square. For the sake of organization, we will place it in /Personal/data/GMOsign as acc.json.
-----acc.json-----
"secret_key": "{secret}",
"cus_id": "{cus_id}"
-----------
Once the deployment is complete, enter the request settings as follows:

- Response Settings

- Header Settings
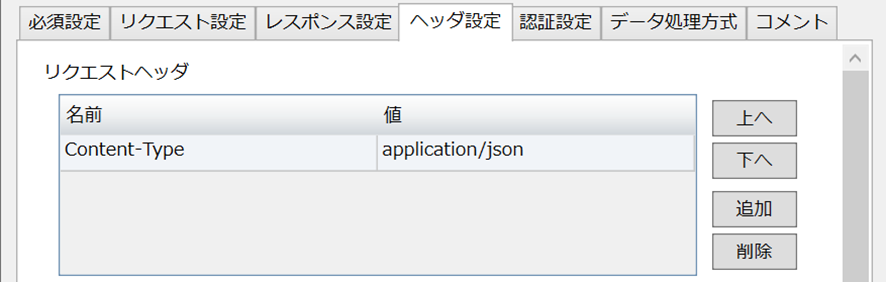
Content-Type : application/json
This completes the setup. Select [Finish].
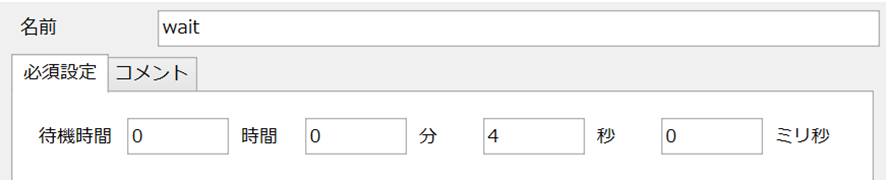
Next, drag and drop [Basic] > [Processing] > [Wait] into the script field, set it as shown below, and click Finish. Then, drag and drop [post_create_token] into [wait] to create the flow.
Next, drag and drop [Network] > [REST] > [Execute POST] into the script field. Set it as follows:
- Required settings
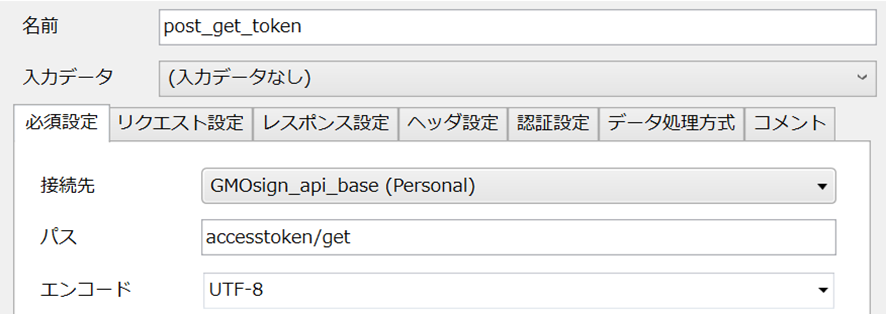
- Connection information (for copying)
name : post_get_token
Destination: GMOsign_api_base
path : accesstoken/get
- Request Settings

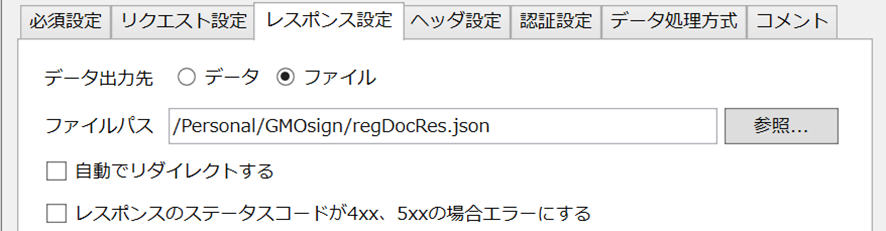
- Response Settings
To treat the HTTP response body as data, you need to set a schema, so first set [Data output destination] to [File]. Specify any location in [File path]. For ease of organization, set it as follows this time.
ex) /Personal/GMOsign/token.json
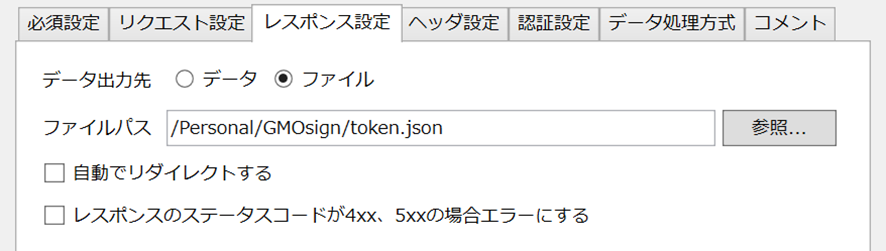
- Header Settings

Content-Type:application/json
Next, drag and drop [start] onto [post_get_token]. This will create a flow. In the same way, create a flow from [post_get_token] to [end], and click the following button in the top menu. This is the button to run the script.

If successful, a pop-up will open informing you that the script was successful. Once you have confirmed this, proceed to the next step.
Next, open the settings for [post_get_token] again. Change the response setting to [Data] as shown below, click the blue [Specify a JSON file to set the output schema], and search for and specify the token.json file you created earlier. Once you're done, click the Done button and close the tab.

Once completed, drag and drop from [wait] to [post_get_token] to create a flow.
Next, drag and drop [Basic] > [Processing] > [Variable Substitution] into the script field, click it, and change the name to [token_variable] in the Property Inspector at the bottom left. Then double-click [token_variable] and set it as follows:
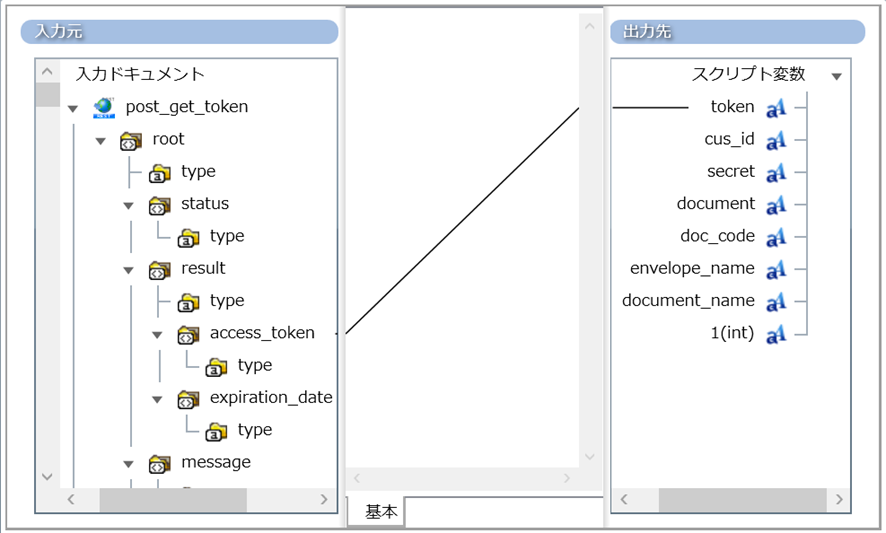
post_get_token/root/result/access_token ----- Script variables/token
This allowed me to enter the access_token from the response into token.
From now on, we will use these script variables to create the request content.
The finished drawing is as follows:

2. Register a contract using API
Next, place [Network] > [REST] > [Execute POST] in the script field and set it as follows. Since all APIs used this time are POST requests, from here on we will just use [Execute POST] and omit the location.
- Required settings
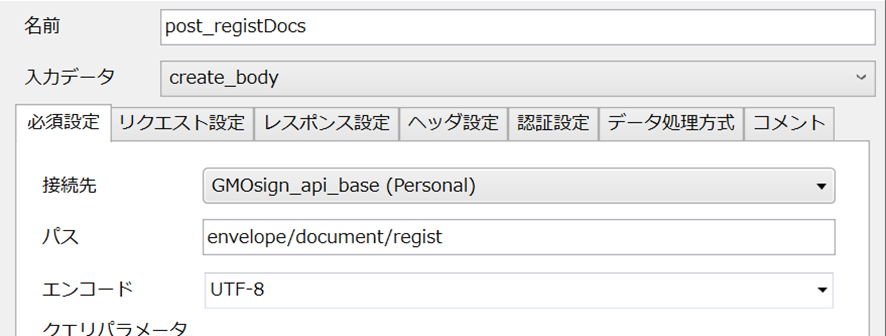
- Connection information (for copying)
name : post_registDocs
Destination: GMOsign_api_base
path: envelope/document/regist
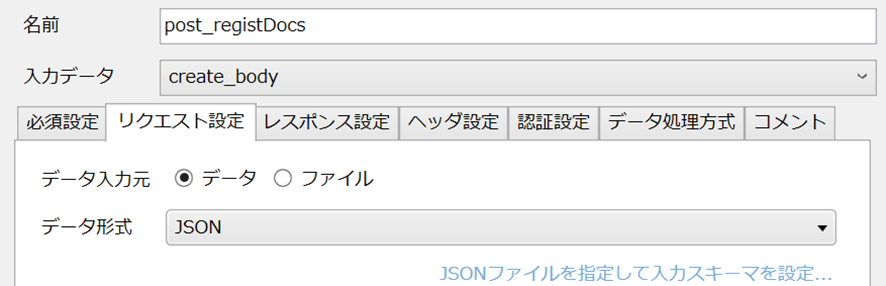
- Request Settings
Save the following json as regDoc.json in the GMO Sign folder in HULFT Square Storage, and specify it in [Specify JSON file to set input schema] to set the schema.
-----regDoc.json-----
{
"secret_key": "",
"cus_id": "",
"access_token": "",
"document_code": "",
"reuse_flag": 1,
"remarks": "",
"document": ""
}
----------
- Response settings (optional)
- Header Settings
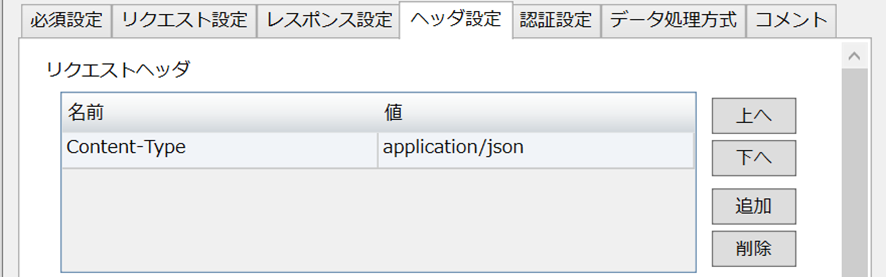
Content-Type:application/json
Once complete, click Finish to complete the setup.
Next, drag and drop Transform > Basic > Mapping into the script field and set the name to create_body from the Property Inspector in the bottom left.
After setting it up, drag and drop [create_body] to [post_registDocs] to draw the process flow and data flow.
Once completed, double-click [create_body] and set it as follows.
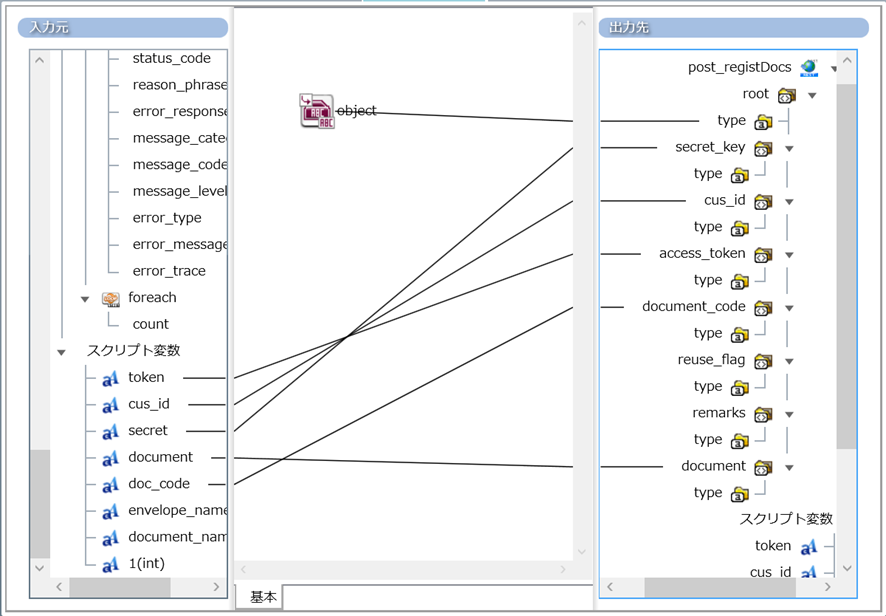
object --- post_regDocs/root/type
token --- post_regDocs/root/access_token
cus_id --- post_regDocs/root/cus_id
secret --- post_regDocs/root/secret_key
doc_code --- post_regDocs/root/document_code
document --- post_regDocs/root/document
An object can be created by dragging and dropping [String] > [Basic] > [Single String Constant] from the tool palette on the right into the field and setting it as follows:

Finally, draw the process flow from [token_variable] to [create_body].
This completes the registration of the contract.
The finished drawing is as follows:

3. Send contracts to multiple recipients at once using API
First, load the CSV sender list. The CSV contents should be as shown below, and placed as test.csv in the GMO Sign folder in HULFT Square.
-----test.csv-----
aaa , aaa@example.com
{name},{email}
{name},{email}
…
-----------
Next, drag and drop [File] > [CSV] > [Read CSV] into the script field, then double-click it and set it as follows:
- Required settings
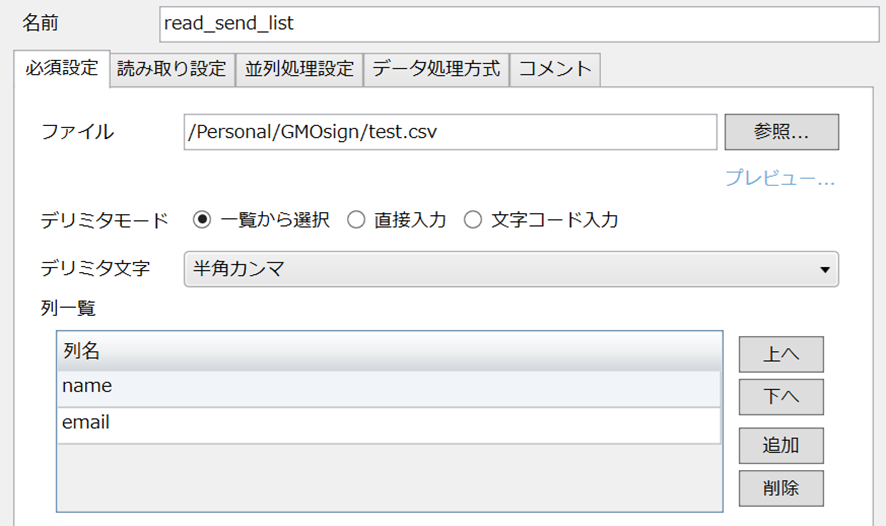
- name : read_send_list
- path : /Personal/GMOsign/test.csv
- Column list: name
email
After setting up, click Finish. Let's also draw a process flow from [post_registDocs] to [read_send_list].
Next, drag and drop [Basic] > [Flow] > [Repeat (Data Count)] into the script field. Drag and drop [read_send_list] onto the placed [foreach] to draw the process flow and data flow.
Then, drag and drop [Execute POST] into the script field and set it as follows:
- Basic settings
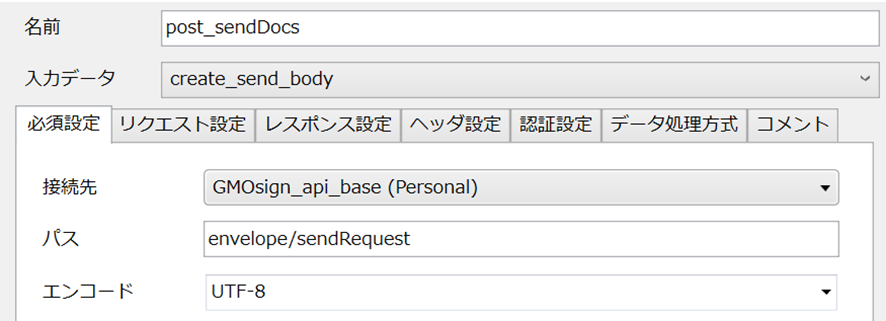
- Connection information (for copying)
name : post_sendDocs
Destination: GMOsign_api_base
path : envelope/sendRequest
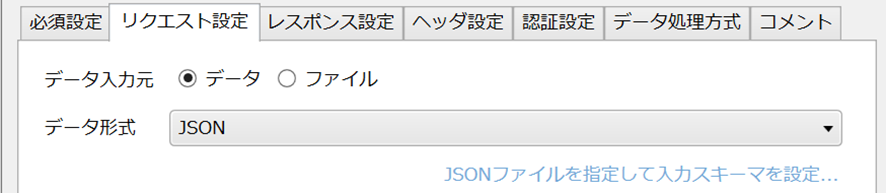
- Request Settings
Store the following sendRequestBody.json in the GMO Sign folder in HULFT Square, and specify it in [Specify a JSON file to set the input schema] to set the schema.
-----sendRequestBody.json-----
{
"secret_key": "",
"cus_id": "",
"access_token": "",
"envelope_name": "",
"document_list": [
{
"document_code":"",
"document_name":""
}
],
"partner_signer_list": [
{
"order_no":"1",
"sign_type":"1",
"name":"",
"email":"",
"is_send_mail":"1",
"document_list":[
{
"document_code":"",
"request_type":"1"
}
]
}
]
}
----------
- Response settings (optional)
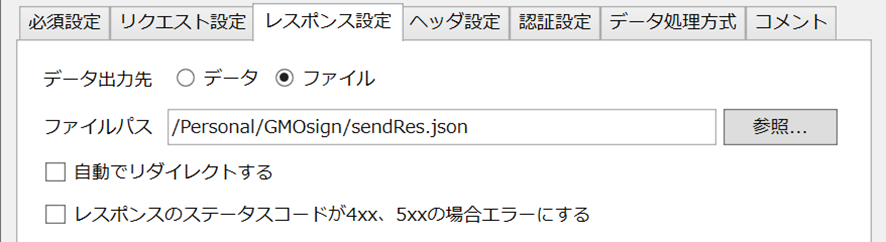
(You can check the operation by looking at the specified file)
- Header Settings
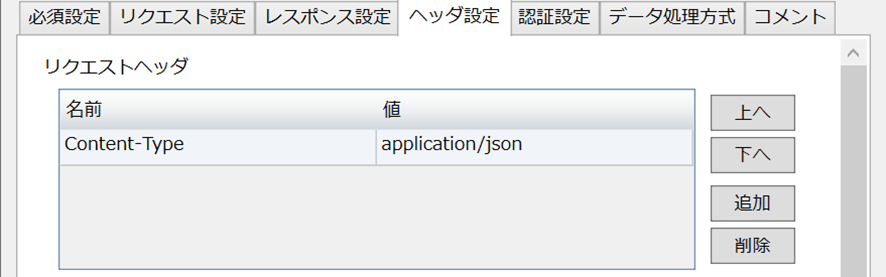
Content-Type:application/json
After setting, click Finish.
Then, drag and drop from [foreach] to [post_sendDocs] to create a process flow, data flow, and additional mapping. Click the created mapping and set the name to [create_send_body] in the Property Inspector on the bottom left.
Once completed, double-click [create_send_body] and set the mapping as follows:
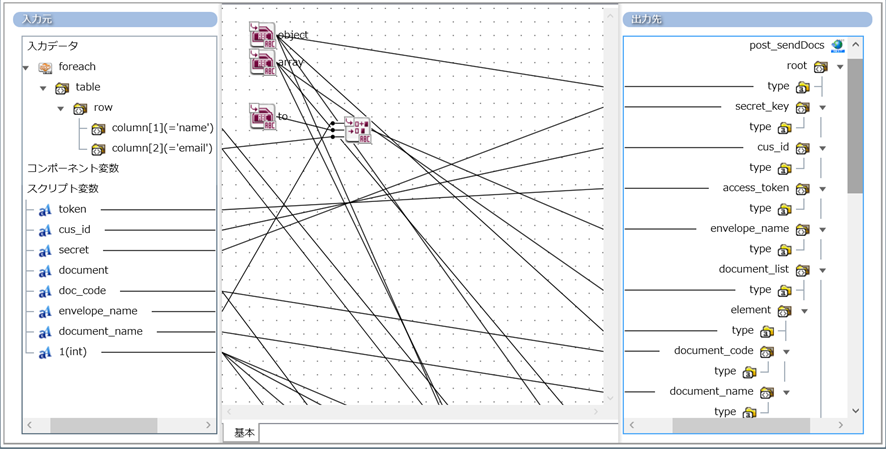
(It's too complicated, so I'll explain it step by step.)
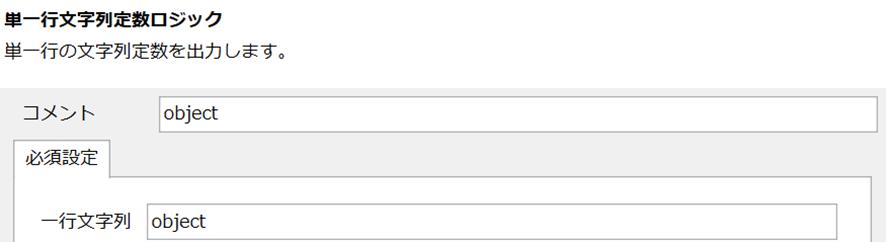
First, drag and drop two [String] > [Basic] > [Single-line String Constant] items from the Tool Palette in the right menu into the field, and set each as follows:
- First object
- Second (array)
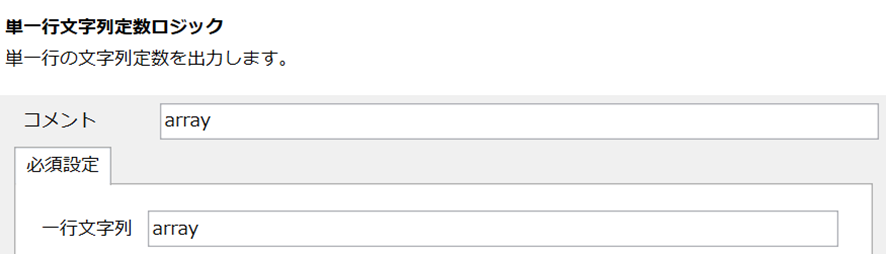
By entering these in the output type, you can specify the object type. Draw the flow for each as follows:
Object and output destination
- post_sendDocs/root/type
- post_sendDocs/root/document_list/emlement/type
- post_sendDocs/root/partner_signer_list/element/type
- post_sendDocs/root/
partner_signer_listelement/document_list/element/type
Array and output destination
- post_sendDocs/root/document_list/type
- post_sendDocs/root/partner_signer_list/type
- post_sendDocs/root/ partner_signer_listelement/document_list/type
Create another Single-Line String Constant and set it as follows:

(*It is [space] to [space])
Next, drag and drop [String] > [Operation] > [Concatenate] from the Tool Palette into the field and set it as follows:
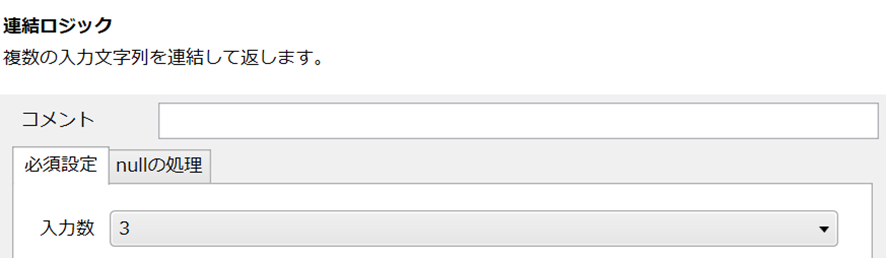
The three inputs of this connection logic will be connected to the following three in order from top to bottom using a flow.
- Script variables/envelope_name
- Single-line string constant [to]
- foreach/table/row/name
This will allow you to concatenate the three inputs in order and output them. Finally, drag and drop the concatenation logic to the output destination, post_sendDocs/root/envelope_name, to create a flow.
Finally, draw a flow from the input source to the output destination as shown below.
- Script Variables/secret --- post_sendDocs/root/secret_key
- Script Variables/cus_id --- post_sendDocs/root/cus_id
- Script Variables/token --- post_sendDocs/root/access_token
- Script Variables/doc_code --- post_sendDocs/root/document_list/element/document_code
- Script variable/document_name---
post_sendDocs/root/document_list/element/document_name - Script Variables/1(int)--- post_sendDocs/root/partner_signer_list/element/order_no.signer_type.is_send_mail
(Draw a flow for order_no, signer_type, and is_send_mail) - foreach/table/row/name---
post_sendDocs/root/partner_signer_list/element/name - foreach/table/row/email---
post_sendDocs/root/partner_signer_list/element/email - Script Variables/1(int)---post_sendDocs/root/partner_signer_list/element/document_list/element/request_type
This completes the process. Close the Mapping tab and return to the Script tab.
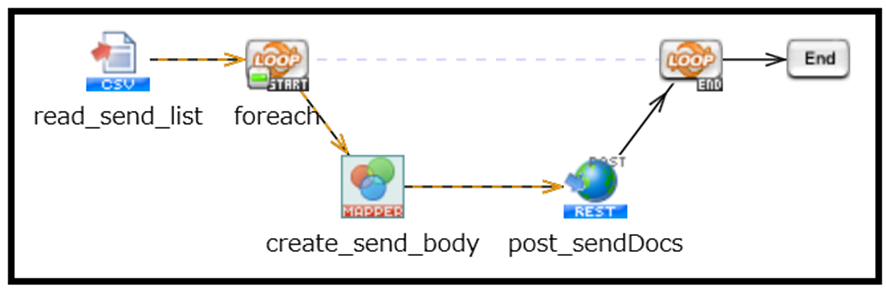
Finally, drag and drop [post_sendDocs] to [foreach_end] (it says end under loop) to draw a process flow, and then draw a process flow from [foreach_end] to [end].
This completes the process. The finished image is as follows:
Creating and Running Scripts
Click the following button from the top menu to run the test.
(If you select the bug button on the left, a log will be saved in the execution log.)

Once the script is complete, check GMO Sign's Document Management. If there are multiple documents sent to the box along with the recipient list, the script was successful.
Conclusion
What did you think?
By using HULFT Square, we were able to send the GMO Sign contract.
Although what was implemented this time was a simple connection check, various information and operations of GMO Sign can be obtained and operated through the API, such as user integration with other services, document sending processing, and destination control. We hope you will take this opportunity to try out integration with GMO Sign with HULFT Square.